Lexi Westingate | Blinds Chalet Design Team


Updated: Jul 8 2026

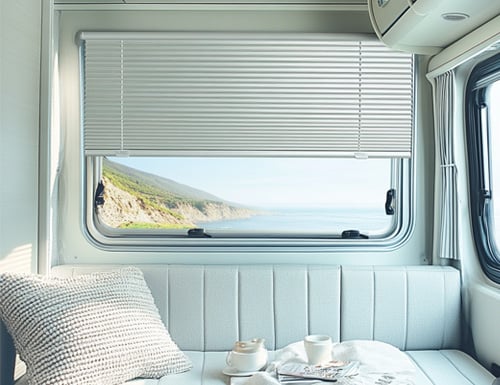
Installing blinds and shades in your RV can significantly improve both comfort and privacy while also adding a touch of personalization to your mobile home. A proper installation ensures that your window treatments function as intended and stay secure during travel. This guide offers tips and advice tailored to various types of recreational vehicles, including motorhomes, travel trailers, fifth-wheel trailers, and pop-up campers, to help you install blinds and shades with ease.
Compare features and styles across our full line of customizable RV window blinds as well as quality made window blinds today.
1. General Installation Tips for All RV Types
Before diving into specific instructions for different RVs, here are some universal tips that apply to every installation:
1.1. Accurate Window Measurements
- Measure Twice, Install Once: Use a metal tape measure for precision. Measure the width and height of the window in three spots—top, middle, and bottom—then use the smallest measurement to ensure a snug fit.
- Inside vs. Outside Mount: Decide whether you prefer an inside mount (where shades fit inside the window frame) or an outside mount (where shades cover the entire frame). This decision will influence the measurements and installation process.
1.2. Tools and Components
- Tools Required: You’ll need a drill, screws, anchors (if necessary), a level, a pencil, and a screwdriver. For motorized shades, ensure you have batteries or access to a power source.
- Check Shade Components: Before starting, double-check that you have all necessary components, including mounting brackets, screws, and any other hardware.
1.3. Prepare the Installation Area
- Clean the Surface: Wipe down the window frame and surrounding area to remove dust and debris that could affect the installation.
- Mark Bracket Locations: Use a pencil to mark where the brackets will be mounted, ensuring the marks are level before drilling.
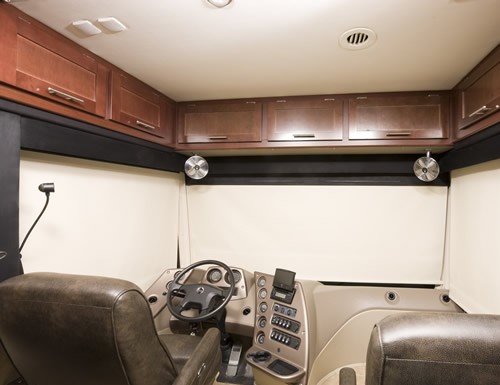
2. Installation Tips for Motorhomes (Class A, B, and C)
Motorhomes vary greatly in size and layout, so it's important to tailor the installation approach based on the specific type:
2.1. Class A Motorhomes: Large Windows and High Ceilings
- Use Motorized Shades for High Windows: Class A motorhomes often have large, hard-to-reach windows, making motorized shades a practical option. Consider integrating them with a remote or smart home system for easy control.
- Install Hold-Down Brackets: To prevent shades from moving during travel, secure the bottom of the shades with hold-down brackets. This is especially important for large and heavy window treatments.
- Opt for Dual-Layer Shades: For large windows, dual-layer shades (such as day/night shades) offer versatility by allowing both light filtering and blackout options.
2.2. Class B Motorhomes: Compact Living Spaces
- Choose Space-Efficient Shades: Camper vans have limited space, so opt for compact solutions like mini blinds or slim roller shades that fit within small windows.
- Cordless for Safety: Cordless shades are ideal in compact spaces to prevent potential entanglements and maintain a sleek look.
- Use Mounting Brackets for Smaller Windows: For smaller windows, choose mounting brackets designed for tight spaces to ensure a secure installation.
2.3. Class C Motorhomes: Mixed Window Sizes
- Custom Sizing for Over-Cab Areas: Windows above the cab in Class C motorhomes often have irregular shapes. Custom-sized shades ensure a perfect fit and can be secured with hold-down brackets to prevent shifting during travel.
- Universal Brackets: Use universal mounting brackets that work across different window sizes, providing consistency in the installation process.
3. Installation Tips for Travel Trailers
With their wide variety of layouts, travel trailers often require a more customized approach to window treatment installation.
3.1. Custom Shades for Different Window Sizes
- Order Custom-Sized Shades: Travel trailers often have non-standard window sizes, so ordering custom-sized shades ensures a proper fit and helps prevent light leaks.
- Secure with Hold-Down Brackets: Especially near the trailer hitch, shades can shift due to movement during towing. Secure these shades with hold-down brackets to prevent damage.
3.2. Installation in Kitchens and Bathrooms
- Choose Moisture-Resistant Materials: In areas exposed to humidity, such as kitchens or bathrooms, install vinyl or moisture-resistant shades to prevent warping or damage.
- Focus on Easy Maintenance: In high-traffic areas, opt for shades that are easy to clean and durable enough to withstand frequent use.
4. Installation Tips for Fifth-Wheel Trailers
Fifth-wheel trailers are known for their spaciousness and large windows, which demand secure installation to prevent shifting while on the road.
4.1. Motorized Shades for Large Windows
- Ease of Operation: Motorized shades are a great option for large windows, offering convenience in hard-to-reach spaces. Ensure the motors and remotes are properly set up and tested before finalizing the installation.
- Heavy-Duty Hold-Down Brackets: For larger shades, use sturdy hold-down brackets to keep them secure while the trailer is in motion, preventing potential damage.
4.2. Installing Shades in High-Ceiling Areas
- Use Safety Gear: When working on high-ceiling windows, always use a secure ladder and wear safety gear to avoid falls.
- Mount Brackets to Secure Locations: Make sure the brackets are mounted to solid structures to support the weight of larger shades.
5. Installation Tips for Pop-Up Campers and Truck Campers
Pop-up and truck campers have unique requirements due to their compact size and collapsible features.
5.1. Lightweight Shades for Pop-Up Campers
- Opt for Lightweight, Portable Shades: Choose lightweight options like pleated or roller shades that are easy to install and remove when the camper is collapsed.
- Use Temporary Hold-Down Solutions: Consider temporary hold-downs like Velcro or adhesive hooks for shades that need to be quickly removed when breaking down the camper.
5.2. Durable Installation for Truck Campers
- Mount to Sturdy Frames: When installing in truck campers, ensure that shades are securely mounted to robust parts of the camper’s frame to prevent them from coming loose on rough terrain.
- Low-Profile Brackets: In tight spaces, use low-profile brackets that keep the installation secure without adding bulk.
Learn More
- What are RV Shades
- Benefits of Window Treatments for Motorhomes
- Pros and Cons of RV Window Shades
- Are Blinds for RVs Worth It?
- Best Selling RV Blinds and Shades
- How Much Do Window Blinds For My RV Cost?
Conclusion: Achieving a Secure and Stylish Installation
Installing blinds and shades in your RV requires attention to detail and thoughtful planning, especially given the variety of vehicle types and window sizes. By following these tailored tips and using the appropriate tools, you can ensure a secure installation that not only looks great but also enhances comfort and functionality. Always remember to use hold-down brackets to prevent shifting during travel, and consider custom-sized shades for a perfect fit. For a wide selection of RV blinds and shades, visit Blindschalet.com and discover the ideal window treatment solutions for your RV.