close
Loading. Please wait...
X

Sign up for special offers:


Lexi Westingate | Blinds Chalet Design Team
FacebookFacebookTwitter (X)Pinterest
Updated: Oct 3 2024

How to Install Composite Shutters: A Complete Guide for a Perfect Fit image
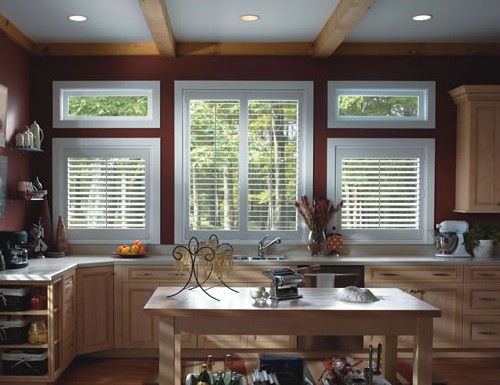
Composite shutters are a great option for window treatments, combining the beauty of real wood with the durability of moisture resistance and low maintenance. While installing these shutters is a project many homeowners can tackle themselves, it's important to follow the correct steps to ensure a secure fit and a professional finish. Below, we've outlined everything you need to know—from preparation and measuring to installation and final adjustments.

1. Preparation: Gather Your Tools and Materials


Before you start, make sure you have all the tools and materials ready. Being prepared will save you time and help you avoid common issues during installation.
Tools You’ll Need:
  • Measuring tape
  • Pencil or chalk for marking
  • Level
  • Power drill with drill bits
  • Screwdriver (Phillips and flathead)
  • Step ladder
  • Hammer (for wall anchors, if needed)
Materials:
  • Composite shutters (cut to fit your windows)
  • Frame pieces (e.g., L-frame, Z-frame)
  • Screws and wall anchors (for drywall)
  • Shims (for leveling, if necessary)
  • Wood filler or caulk (optional for filling small gaps)
Why It Matters: Starting with the right tools and materials ensures the installation goes smoothly without interruptions.

2. Measure Your Windows for a Perfect Fit


Accurate measurements are critical to making sure your shutters fit correctly, whether you're installing them inside or outside the window frame.

Inside Mount:
  1. Measure the window opening’s width at the top, middle, and bottom. Use the narrowest measurement to ensure a snug fit.
  2. Measure the height of the window from the top to the sill at the left, center, and right, and use the shortest measurement.
  3. Ensure your window depth meets the requirements for your chosen frame type.
Outside Mount:
  1. Measure the width of the window, adding 3 to 4 inches to each side for full frame coverage.
  2. Measure the height from the top of the window to the desired length, typically extending just below the sill.
Why It Matters: Proper measurements help prevent issues like gaps or misalignment, giving your shutters a professional finish.

3. Assemble and Prepare the Frame


The shutter frame forms the foundation of your installation. Correct assembly and alignment are key to a successful outcome.

Steps for Assembly:
  • Lay the frame pieces on a flat surface and align them as they’ll sit around the window.
  • Connect the pieces using the screws or connectors provided, ensuring the frame is square.
  • Check the alignment with a level before continuing.
Dry Fitting the Frame:
  • Place the assembled frame into the window opening to check the fit. Use shims if needed and mark its position with a pencil.
Why It Matters: A well-assembled frame ensures your shutters will operate smoothly and fit securely.

4. Install the Shutter Frame


Once the frame is ready, it’s time to secure it to the window or wall.

Inside Mount:
  1. Drill pilot holes through the frame and into the window casing.
  2. Secure the frame with screws, starting at the top and working your way down. Ensure the frame stays level as you tighten the screws.
  3. Use shims to adjust the alignment if needed.
Outside Mount:
  1. Hold the frame in place, centering it over the window opening. Mark the screw positions on the wall.
  2. Drill pilot holes, insert wall anchors if necessary, and attach the frame with screws.
Why It Matters: Securing the frame properly is essential for stability and smooth shutter operation.

5. Attach the Shutter Panels


With the frame installed, you’re ready to attach the shutter panels.
  1. Align the panels with the pre-installed hinges on the frame.
  2. Use the screws provided to secure the panels, being careful not to overtighten.
  3. Test the operation by opening and closing the panels to ensure they move smoothly.
Why It Matters: Properly aligned panels ensure smooth operation and a clean, finished look.

6. Final Adjustments and Touch-Ups


After installation, make any final adjustments and touch up for a polished result.
  • Hinge Adjustments: Adjust the hinges if the panels aren’t aligning or moving smoothly.
  • Fill Gaps: Use wood filler or caulk to seal small gaps between the frame and the wall.
  • Touch-Up Paint: Apply paint or stain to cover any scratches for a seamless appearance.
Why It Matters: Final adjustments ensure both a professional appearance and long-lasting function.

7. Additional Tips for Success

  • Take Your Time: Rushing can lead to mistakes, so move carefully through each step.
  • Use the Right Tools: Make sure you have the proper tools for an easier and more accurate installation.
  • Follow Manufacturer Instructions: Each shutter system is different, so always follow the guidelines provided with your product.
  • Get Help if Needed: If you’re unsure about any step, don’t hesitate to seek help from a professional installer.
Why It Matters: Attention to detail will help you achieve a long-lasting and visually appealing installation.

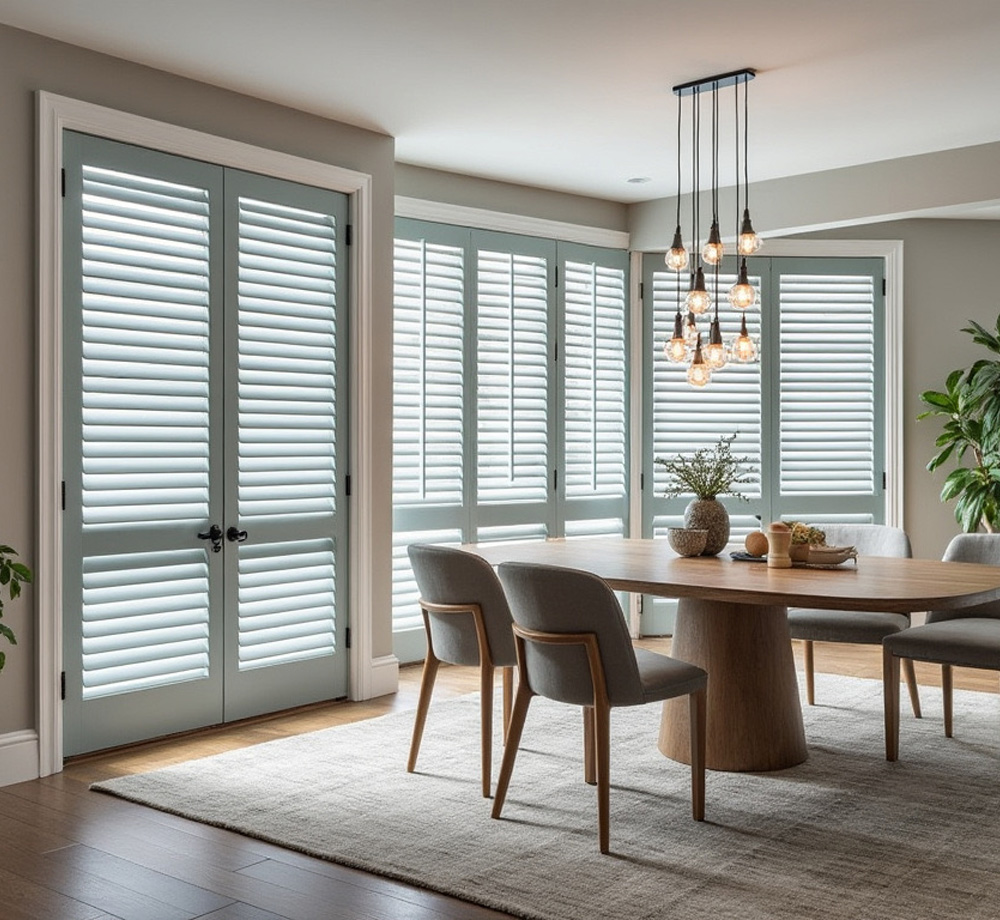
Conclusion: Installing Composite Shutters for a Flawless Finish


Installing composite shutters is a manageable DIY project that can enhance both the look and function of your windows. By following these steps and taking the time to measure and adjust everything carefully, you can achieve a polished and professional installation that will last for years to come.


Shop Wood Alternative Shutters

Back to Top
x Blinds Chalet Guarantee Options
DetailsGoodBetterBest
PricingFREE$$$
Duration
3 year limited warranty
5 year limited warranty
5 year unlimited
Warranty
Defects
Parts
Restrings
Normal wear & tear
Anything
30 Day Returns
3 Year Standard Guarantee
Who is covered:
  • Warranties cover the original purchaser of the window blinds and shades.
What is covered:
  • Any defects in materials of workmanship
  • Operating mechanisms and other parts
  • Cell separation on honeycomb/cellular shades
  • Warping slats for faux wood and wood blinds
  • Broken vertical vanes
  • Restrings for internal cords
What is not covered:
  • Parts that fail due to accident, alteration and/or improper use
  • Normal wear and tear
  • Color fading due to excessive exposure to sunlight, moisture or improper cleaning
  • Accidental damage
Resolution:
  • BlindsChalet.com reserves, at its discretion, the right to repair, replace or refund any blinds found defective.
  • If there are multiple blinds/shades in the same room, only the defective product will be replaced/repaired.
  • In the event that a product, color or product feature has been discontinued and it is no longer available we will provide a substitute product as similar as possible to the original blind or shade.
  • Shipping for warranty issues is the responsibility of the customer to and from the repair facility. Packaging on return shipments is the responsibility of the customer.

30 Day Returns

This plan does not cover returns.
5 Year Guaranteed to Last
Who is covered:
  • Warranties cover the original purchaser of the window blinds and shades.
What is covered:
  • Any defects in materials of workmanship
  • Operating mechanisms and other parts
  • Cell separation on honeycomb/cellular shades
  • Warping slats for faux wood and wood blinds
  • Broken vertical vanes
  • Restrings for internal cords
What is not covered:
  • Parts that fail due to accident, alteration and/or improper use
  • Normal wear and tear
  • Color fading due to excessive exposure to sunlight, moisture or improper cleaning
  • Accidental damage
Resolution:
  • BlindsChalet.com reserves, at its discretion, the right to repair, replace or refund any blinds found defective. Limit 1 remake per covered product.
  • If there are multiple blinds/shades in the same room, only the defective product will be replaced/repaired.
  • In the event that a product, color or product feature has been discontinued and it is no longer available we will provide a substitute product as similar as possible to the original blind or shade.
  • Shipping for warranty issues is the responsibility of the customer to and from the repair facility. Packaging on return shipments is the responsibility of the customer.

30 Day Returns

This plan does not cover returns.
5 Year Guaranteed to Love
Who is covered:
  • Warranties cover the original purchaser of the window blinds and shades.
What is covered:
  • Any defects in materials of workmanship
  • Operating mechanisms and other parts
  • Cell separation on honeycomb/cellular shades
  • Warping slats for faux wood and wood blinds
  • Broken vertical vanes
  • Restrings for internal cords
  • Parts that fail due to accident, alteration and/or improper use
  • Normal wear and tear
  • Color fading due to excessive exposure to sunlight, moisture or improper cleaning
  • Accidental damage
Resolution:
  • BlindsChalet.com reserves, at its discretion, the right to repair, replace or refund any blinds found defective. Limit 1 remake per covered product.
  • If there are multiple blinds/shades in the same room, only the defective product will be replaced/repaired.
  • In the event that a product, color or product feature has been discontinued and it is no longer available we will provide a substitute product as similar as possible to the original blind or shade.
  • Shipping for warranty issues is the responsibility of the customer to and from the repair facility. Packaging on return shipments is the responsibility of the customer.

30 Day Returns

If for any reason you are not satisfied with the window coverings and wish to return them for store credit, please notify us within 30 days of receiving the order. Our customer care department will provide a Return Goods Authorization number (RGA) and shipping address for the return. Please note, return shipping costs are the responsibility of the customer and shipping labels are not provided. Returns are for store credit only and store credit will be available immediately after the items are received (Guaranteed to Love fee is not credited).

Shutters,custom graphic shades, commercial/dealer orders are not covered.
ad
X
The term "Retail" price refers to the manufacturer's or supplier's suggested retail price for an item. The initially displayed Retail price is specific to a product with the selected dimensions and default options/features. Please note that the Retail price for the selected product will be provided upon specifying its width, height, features and options.

Please note that the Retail price may not reflect the prevailing market price or the regular retail price. It is common for products to be sold at lower prices than the Retail price due to various factors, including promotional events, discounts, market competition, or supplier agreements.

Products may be offered at the same or lower "After Coupon" prices during future promotional events starting on or after the final day of any advertised promotion.

Learn More