close
Loading. Please wait...
X

Sign up for special offers:


Lexi Westingate | Blinds Chalet Design Team
FacebookFacebookTwitter (X)Pinterest
Updated: Sep 23 2024

How to Install Vertical Blinds: A Step-by-Step Guide image
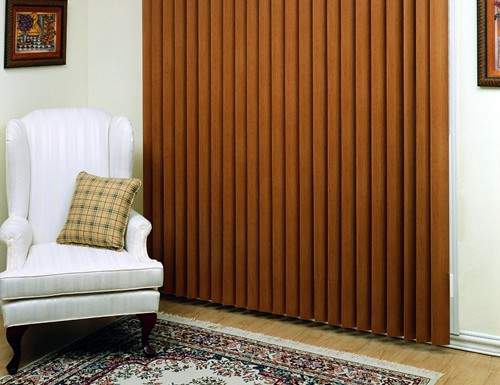
Vertical blinds are a practical, stylish choice for large windows, sliding glass doors, and patio doors. Installing them yourself is a great way to enhance your home’s look while saving on costs. With the right tools and a clear plan, the process is simple, even for DIY beginners. Here’s a step-by-step guide to help you install vertical blinds securely and ensure smooth operation.

1. Preparation: Tools and Measuring Your Windows


Before starting, gather your tools and measure your windows carefully to ensure a perfect fit.
Tools You’ll Need:
  • Measuring tape
  • Pencil
  • Power drill
  • Screwdriver
  • Level
  • Step ladder
  • Mounting brackets and screws (usually included)
Measuring for Inside Mount:
  1. Measure the inside width of the window frame at the top, middle, and bottom. Use the smallest measurement to ensure the blinds fit snugly.
  2. Measure the height from the top of the inside frame to the window sill, using the longest measurement for full coverage.
Measuring for Outside Mount:
  1. Measure the width of the window frame and add 3 to 4 inches on each side for better coverage and light control.
  2. Measure the height from the top of the window frame to where you want the blinds to end, typically a few inches below the frame.
Why Accurate Measurements Matter: Proper measurements ensure the blinds fit well, operate smoothly, and prevent gaps that let in light or reduce privacy.

2. Marking and Installing the Mounting Brackets


With your measurements complete, it’s time to install the mounting brackets that will hold the headrail.

Marking Bracket Placement:
  • Use a pencil to mark where the mounting brackets will go. For inside mounts, brackets go on the inside top of the frame. For outside mounts, mark just above the frame. Make sure they are evenly spaced.
Drilling Pilot Holes:
  • Drill small pilot holes where you’ve marked the bracket placements to make it easier to screw them in without damaging the frame or wall.
Installing the Brackets:
  • Attach the brackets using the provided screws, ensuring they are securely in place. Use a level to check that the brackets are even before tightening them fully.
Pro Tip: Check the alignment of the brackets before fully tightening the screws. Misaligned brackets can cause the blinds to hang crookedly and affect their operation.

3. Attaching the Headrail


After securing the brackets, it’s time to attach the headrail, which holds the slats and controls the blinds.

Inserting the Headrail:
  • Lift the headrail into place, aligning it with the brackets. Depending on your blind model, it may click or snap into position. Make sure it’s secure and properly aligned with the window.
Testing the Mechanism:
  • Before proceeding, test the headrail by sliding it back and forth to ensure it moves smoothly.
Pro Tip: If your blinds include a valance, attach it after installing the headrail for a polished look.

4. Installing the Vertical Blind Slats


Once the headrail is installed, it’s time to attach the slats.Attaching the Slats:
  • Starting from one side, hook or clip each slat onto the headrail’s carriers. Ensure each slat is secure and hangs straight, without touching the floor or dragging.
Testing the Movement:
  • After attaching all the slats, test the wand or chain to ensure they open, close, and slide smoothly.
Pro Tip: If any slats seem misaligned, detach and reattach them, ensuring they are properly fastened.

5. Final Adjustments and Safety Features


Now that the blinds are up, make any necessary adjustments and ensure they’re safe for everyone in your home.

Adjusting the Length:
  • Some models allow you to remove extra slats if they’re too long. Follow the manufacturer’s instructions for adjusting the length.
Installing a Cord Cleat (Optional):
  • For corded blinds, install a cord cleat to keep the cords safely out of reach of children and pets. Wrap the cords around the cleat to prevent accidents.
Pro Tip: Give the blinds one final test to ensure smooth operation. If you notice any resistance, check the alignment of the brackets and headrail.

Conclusion: A Smooth Installation for Long-Lasting Vertical Blinds


Installing vertical blinds is a straightforward DIY project that can transform any room. By taking accurate measurements and following these steps, you’ll ensure a secure fit and smooth operation. Vertical blinds provide excellent light control, privacy, and style, making them ideal for large windows and sliding doors.

For custom vertical blinds or professional installation services, visit BlindsChalet.com to explore a wide range of options tailored to your home.


Shop Vertical Blinds


Share Recently Viewed
Email your recently viewed items:


Keep me up to date on the latest news & exclusive offers

Recently Viewed

Back to Top
x Blinds Chalet Guarantee Options
DetailsGoodBetterBest
PricingFREE$$$
Duration
3 year limited warranty
5 year limited warranty
5 year unlimited
Warranty
Defects
Parts
Restrings
Normal wear & tear
Anything
30 Day Returns
3 Year Standard Guarantee
Who is covered:
  • Warranties cover the original purchaser of the window blinds and shades.
What is covered:
  • Any defects in materials of workmanship
  • Operating mechanisms and other parts
  • Cell separation on honeycomb/cellular shades
  • Warping slats for faux wood and wood blinds
  • Broken vertical vanes
  • Restrings for internal cords
What is not covered:
  • Parts that fail due to accident, alteration and/or improper use
  • Normal wear and tear
  • Color fading due to excessive exposure to sunlight, moisture or improper cleaning
  • Accidental damage
Resolution:
  • BlindsChalet.com reserves, at its discretion, the right to repair, replace or refund any blinds found defective.
  • If there are multiple blinds/shades in the same room, only the defective product will be replaced/repaired.
  • In the event that a product, color or product feature has been discontinued and it is no longer available we will provide a substitute product as similar as possible to the original blind or shade.
  • Shipping for warranty issues is the responsibility of the customer to and from the repair facility. Packaging on return shipments is the responsibility of the customer.

30 Day Returns

This plan does not cover returns.
5 Year Guaranteed to Last
Who is covered:
  • Warranties cover the original purchaser of the window blinds and shades.
What is covered:
  • Any defects in materials of workmanship
  • Operating mechanisms and other parts
  • Cell separation on honeycomb/cellular shades
  • Warping slats for faux wood and wood blinds
  • Broken vertical vanes
  • Restrings for internal cords
What is not covered:
  • Parts that fail due to accident, alteration and/or improper use
  • Normal wear and tear
  • Color fading due to excessive exposure to sunlight, moisture or improper cleaning
  • Accidental damage
Resolution:
  • BlindsChalet.com reserves, at its discretion, the right to repair, replace or refund any blinds found defective. Limit 1 remake per covered product.
  • If there are multiple blinds/shades in the same room, only the defective product will be replaced/repaired.
  • In the event that a product, color or product feature has been discontinued and it is no longer available we will provide a substitute product as similar as possible to the original blind or shade.
  • Shipping for warranty issues is the responsibility of the customer to and from the repair facility. Packaging on return shipments is the responsibility of the customer.

30 Day Returns

This plan does not cover returns.
5 Year Guaranteed to Love
Who is covered:
  • Warranties cover the original purchaser of the window blinds and shades.
What is covered:
  • Any defects in materials of workmanship
  • Operating mechanisms and other parts
  • Cell separation on honeycomb/cellular shades
  • Warping slats for faux wood and wood blinds
  • Broken vertical vanes
  • Restrings for internal cords
  • Parts that fail due to accident, alteration and/or improper use
  • Normal wear and tear
  • Color fading due to excessive exposure to sunlight, moisture or improper cleaning
  • Accidental damage
Resolution:
  • BlindsChalet.com reserves, at its discretion, the right to repair, replace or refund any blinds found defective. Limit 1 remake per covered product.
  • If there are multiple blinds/shades in the same room, only the defective product will be replaced/repaired.
  • In the event that a product, color or product feature has been discontinued and it is no longer available we will provide a substitute product as similar as possible to the original blind or shade.
  • Shipping for warranty issues is the responsibility of the customer to and from the repair facility. Packaging on return shipments is the responsibility of the customer.

30 Day Returns

If for any reason you are not satisfied with the window coverings and wish to return them for store credit, please notify us within 30 days of receiving the order. Our customer care department will provide a Return Goods Authorization number (RGA) and shipping address for the return. Please note, return shipping costs are the responsibility of the customer and shipping labels are not provided. Returns are for store credit only and store credit will be available immediately after the items are received (Guaranteed to Love fee is not credited).

Shutters,custom graphic shades, commercial/dealer orders are not covered.
ad
X
The term "Retail" price refers to the manufacturer's or supplier's suggested retail price for an item. The initially displayed Retail price is specific to a product with the selected dimensions and default options/features. Please note that the Retail price for the selected product will be provided upon specifying its width, height, features and options.

Please note that the Retail price may not reflect the prevailing market price or the regular retail price. It is common for products to be sold at lower prices than the Retail price due to various factors, including promotional events, discounts, market competition, or supplier agreements.

Products may be offered at the same or lower "After Coupon" prices during future promotional events starting on or after the final day of any advertised promotion.

Learn More