Lexi Westingate | Blinds Chalet Design Team


Updated: Jul 8 2026

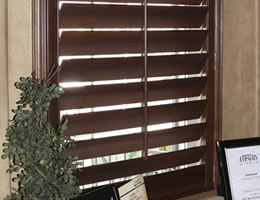
Installing real wood shutters can transform your home with timeless beauty and functionality. While it might seem like a big task, with the right tools and a good plan, it’s a project most homeowners can handle. This guide will walk you through the process from preparation to final installation, so you can be confident your shutters will not only look fantastic but work smoothly for years to come.
Shop timeless and functional custom-fit plantation shutters and real wood shutters for inside tailored to your exact needs.
1. Prepare Your Tools and Materials
Before diving in, make sure you have everything you’ll need to make the process go smoothly.
Tools:
- Measuring tape
- Pencil
- Power drill (with bits)
- Screwdrivers (Phillips and flathead)
- Level
- Ladder
- Hammer
- Your custom wood shutters
- Mounting brackets and screws (included with your shutters)
- Optional: wood filler, paint, or stain for touch-ups
2. Measure Your Windows Accurately
Measuring correctly is essential for a perfect fit. Whether you’re doing an inside or outside mount, follow these steps to ensure accuracy:
Inside Mount:
- Measure the window’s width at the top, middle, and bottom. Use the smallest measurement.
- Measure the height at three points (left, center, right) and go with the shortest.
- Confirm the window’s depth to ensure the shutters will fit.
- Measure the width of the window, adding 3-4 inches to each side for coverage.
- Measure the height from the top of the window to where you want the shutters to end.
3. Install the Frame
The frame is the foundation of your shutters. Whether you're using an L-frame, Z-frame, or doing an outside mount, installing it correctly is crucial.
Inside Mount (L-Frame or Z-Frame):
- Position the frame inside the window and use a level to make sure it’s straight.
- Mark where the mounting holes should go, then drill pilot holes for the screws.
- Secure the frame in place, checking again that everything is level.
- Align the frame around the window, and mark the mounting holes.
- Drill pilot holes and, if needed, insert wall anchors.
- Attach the frame securely, ensuring it’s level.
4. Attach the Shutter Panels
With the frame in place, it’s time to attach the panels. This is where precision is important to ensure the shutters open and close easily.
- Line up the panels with the hinges on the frame and secure them with the provided screws.
- Make sure to test each panel’s movement. Adjust the hinges if necessary for smooth operation.
5. Add Optional Features Like Divider Rails and Tilt Rods
If your shutters include divider rails or tilt rods, now’s the time to install them.
- Divider Rails: These allow you to open the top and bottom sections independently.
- Tilt Rods: Attach according to your preference for either a traditional or hidden rod.
6. Final Adjustments and Touch-Ups
Now that your shutters are up, it’s time for any final tweaks.
- Check that everything is aligned and that the panels open and close smoothly.
- Fill any small gaps with wood filler, and touch up with paint or stain as needed.
Conclusion:
Installing real wood shutters doesn’t have to be overwhelming. With this guide, you can approach the project confidently, knowing you’re taking the right steps for a flawless result. Whether you're adding style, function, or both to your home, real wood shutters are an elegant and durable choice.
If you'd rather leave the installation to the pros or need help choosing the perfect shutters, give Blinds Chalet a call at 888-633-7840 or use our live chat to schedule a consultation.
Related Articles
- Real Wood Compared to Faux Wood Shutters
- Best Locations for Real Wood Shutters
- Investing in Real Wood Shutters is Smart