If your new custom window shades have recently been delivered and you’re getting ready to put them up, you may be wondering if you’re prepared to start the process. Do you know how to install Solid Print Roman Shades? If you feel like you need a refresher before you jump in feet first, here’s a breakdown of the process.
Your Solid Print Roman Shades Shipment: Identifying Your Shades
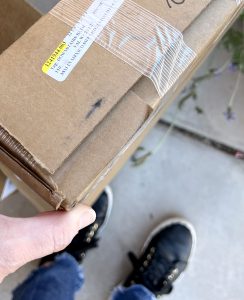
You’ll notice the “name” created by the customer for this shade is printed on the outside of the box on a small label. It’s referred to under “Tag” as “Downstairs bath.”
Before you even open your boxes, there’s something you should look for on the box exterior. Check for a label (generally a separate label smaller than the actual shipping label) that designates what is included in the box. Along with the basic product info, you should also see the “name” you gave the shade when you input the measurements and specifications and added it to your cart on BlindsChalet.com.
For example, you may have “named” your shade something like “movie room” or “Master West Wall” or “Nursery #1,” etc. Paying attention to the “names” printed on the box label makes it far easier to identify your different shades without remeasuring each and every one and comparing them to your original window measurements.
Check for Missing Shades or Missing Boxes:
Before you dive in and start installing your window shades, we also recommend that you do a quick check to make sure you’ve got all the shades you ordered, all the boxes in your shipment have arrived, and that your shades are going to fit in your windows (there were not measurement mistakes – on your end OR our end). Checking the labels to identify which rooms and windows your shades belong to makes it much quicker to determine if there are any window shades missing from your order. If for some reason, you have a shade or two missing…call customer service or jump online to chat with one of the Design Consultants. But not until you double check that your full order has been delivered. A missing shade will sometimes mean that your order is arriving in multiple boxes, and there may still be a box or two in transit.
For example, if you received 2 boxes and they are marked 1 of 3 and 3 of 3 – there’s one box that hasn’t been delivered. Sign in to your account at BlindsChalet.com and check your order status to see if there’s still one more box on the way, and track it for its eta. Or call customer service or access a Design Consultant through Online Chat.
Do a Quick Pre-Install Check that the All the Shades’ Measurements Look Good:
Once you’ve got all your window shades or window blinds, and you’ve determined where they belong. Do a quick check to make sure everything’s ready to go by holding them up physically to the window where you’re installing each one to make sure they fit either inside the window frame (for interior mount) or in the right placement on the outside of the window frame (for exterior mount). If there are any shades that do not seem to fit, check them against the original measurements you submitted with your order by signing in to your account at BlindsChalet.com. If the shade or blinds don’t match the measurements you submitted for the window, contact customer service or a Design Consultant right away by email, phone or Online Chat, so they can help you get it replaced.
Identify and Organize Your Mounting Hardware:
Once you’ve determined that you have all your roman shades, and you’re ready to get started on the DIY install, focus on the hardware included in the boxes. Your Solid Print Roman Shades will include a mounting hardware kit:
- Mounting Brackets (2 for shades up to 36″ wide, 3 for shades 36″ to 48″ wide, 4 for shades 48″ to 96″ wide)
- 1 ¼” Screws (2 for shades up to 36″ wide, 3 for shades 36″ to 48″ wide, 4 for shades 48″ to 96″ wide)
- ¾” Screws* (2 for shades up to 36″ wide, 3 for shades 36″ to 48″ wide, 4 for shades 48″ to 96″ wide)
- Cord Cleat (1 for each shade – includes ¾” screws)
*¾” screws are used for outside mount installations only. In an exterior mount installation of the Solid Print Roman Shades, the ¾” screws attach the brackets to the headrail.
How to Install Solid Print Roman Shades: Recommended Tools
A few standard tools are not included with your order but will be needed to complete the installation.
- Pencil
- Tape Measure
- Level
- Screwdriver
- Level
- Drill
- Step stool or ladder
Specialty anchors (if you are installing your shades in wallboard or plaster, use anchors specifically designed for hollow walls. If you are installing your shades in concrete, stone, or brick, use a masonry drill bit and anchors or screws specifically designed for masonry).
How to Install Solid Print Roman Shades: Exterior Mount
- Position one bracket about 2-6″ from each end of the headrail. (For wider shades requiring 3 or 4 brackets, space them evenly between the two outermost brackets).
- Make sure the brackets do not interfere with the cord guides or cord lock or in any way impede the movement of the lift cords. To accomplish this, we recommend holding the shade in place to mark the best bracket locations with a pencil.
- Use a level to make sure your brackets are level.
- Predrill your holes using a 5/64″ drill bit.
- Screw the brackets in place.
- If your Solid Print Roman Shade is “Cords-Forward” or has lift cords visible on the front of the shade, skip to Step 13.
- For standard shades (with cords concealed behind the face of the shade), place the headrail on top of the brackets.
- Center the shade over the window opening.
- Mark the location of the mounting hole on the headrail.
- Pierce the fabric at the marked mounting hole locations with the tip of a screw.
- Then use a 5/64″ drill bit to predrill the mounting holes.
- Attach the shade to the bracket using the ¾” screws.
- If your Solid Print Roman Shades are “Cords Forward,” hold the headrail up against brackets with the bracket above the headrail.
- Center the shade over the window opening.
- Mark the location of the mounting holes on the headrail.
- Using a 5/64″ drill bit, predrill mounting holes in the headrail.
- Attach the shade to the bracket using the ¾” screws drilling the screws down into the bracket and through the top of the headrail.
- Skip to the section below about installing the Cord Cleats.
How to Install Solid Print Roman Shades: Interior Mount

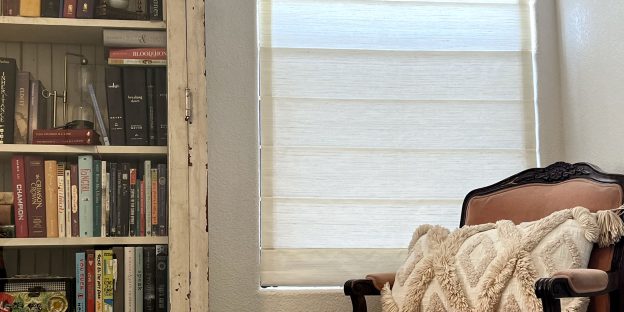
Follow these step-by-step instructions to install your Solid Print Roman Shades (seen here in Sherlock White) using an interior mount.
- Mounting holes are pre-drilled in the headrail, so brackets are not required.
- Align the front of the shade with the front edge of the window opening (or position as desired), making sure the shade is centered in the window opening.
- Hold the shade’s cloth up and over the head rail.
- Predrill the mounting holes using a 5/64″ drill bit.
- Screw the shade in place using the 1/1/4″ screws.
- Skip to the section below about installing the Cord Cleats.
If possible, have a helper on hand, as a second set of hands makes this job much easier.
How to Install Solid Print Roman Shades: Alternate Exterior Mount
When installing using an outside mount with an upended head rail, use the following step by step roman shade installation instructions.
- Mounting holes are pre-drilled in the headrail, so brackets are not required.
- Position the shade as desired over the window opening.
- Use a level to make sure the shade is level.
- Hold the shade cloth up and over the head rail.
- Predrill the mounting holes using a 5/64″ drill bit.
- Screw the roman shade in place using the 1 ¼” screws.
- Skip to the section below about installing the Cord Cleats.
Again, it’s best to have a helper on hand as a second set of hands makes this job much easier.
How to Install Solid Print Roman Shades: Installing the Cord Cleats
- Attach the Cord Cleat to the wall or window frame using the screws provided.
- Position the cleat high enough that it is out of the reach of children.
- When the roman shades are raised or partially raised, the lift cord is wrapped around the secured Cord Cleat to avoid dangers posed to young children.
How to Operate Your Solid Print Roman Shades:
You’ve successfully installed your solid print roman shades, and now you want to use them. To use your shades, simply pull the lift cord slightly to release the cord lock. Once the cord lock is released, you use the lift cord to control the shade (raising or lowering it to the desired height). Once you have the shade in the preferred position, move the lift cord slightly toward the outside of the shade to lock it in place.
Find More Helpful Window Shade How-Tos and Home Decor Inspiration:
Looking for more how-to’s, helpful tips and hints, and home decor inspiration, follow us on social media; just search for @blindschalet on your favorite platform. And, of course, shop for your solid print roman shades amidst the wide variety of custom window shades and custom window blinds available at BlindsChalet.com.
